Friday, September 27, 2013

Feh and Wallpaper Openbox Session

The Debian Series - Part VI


Feh is an X11 image viewer aimed mostly at console users. Unlike most other viewers, it does not have a fancy GUI, but simple displays images. It is controlled via command line arguments and configurable key/mouse actions. Feh can also be used to manage the desktop wallpaper for standalone window manager lacking such features.

To install feh :
$ sudo apt-get install feh


Installing feh.


Since you do not have any wallpaper yet, you might want to download this debian wallpaper:


rename the file:

$ mv si0ux_-_Debblue.png mywallpaper.png

and set it as the default wallpaper :

$ feh --bg-scale mywallpaper.png
feh will create a file ~/.fehbg after running the command above. 

here is the result:


now edit the autostart.sh to make sure the wallpaper is loaded at every openbox session:
$ nano .config/openbox/autostart.sh

add 
eval `cat $HOME/.fehbg` &

Save the file and we're good.


Wednesday, September 25, 2013

Tint2 Panel

The Debian Series - Part V


tint2 is a simple panel/taskbar unintrusive and light (memory / cpu / aesthetic).


Tint2 has following features :
  • panel with taskbar, systray, clock and battery status
  • easy to customize : color/transparency on font, icon, border and background
  • pager like capability : send task from one workspace to another, switch workspace
  • multi-monitor capability : one panel per monitor, show task from current monitor
  • customize mouse event
  • window manager's menu
  • tooltip
  • autohide
  • clock timezones
  • real & fake transparency with autodetection of composite manager
  • panel's theme switcher 'tint2conf'
To install tint2, open the terminal and type:
$ sudo apt-get install tint2


To run tint2 simply type :
$ tint2 &

Run tint2 at the first time will return an error message. Why?
Tint2 has a configuration file in ~/.config/tint2/tint2rc.  At first run, tint2 tries to copy the configuration file with the default settings into /.config/tint2 on your home directory, that unfortunately is not exist yet.


no .config directory.


create the directory:
$ mkdir -p .config/tint2
$ tint2 &

and here we go. we have a panel ready to be customized. 


Now, we create openbox autostart.sh and set tint2 to run everytime the openbox session starts.
$ nano .config/openbox/autostart.sh

save the file and done.

How to configure tint2 here.


back : The Debian Menu.
next : OPenbox Wallpaper.

The Debian Menu

The Debian Series - Part IV

The openbox session only shows a black screen so far.

Since you're looking at nothing more than a black screen, you may be wondering where the menu is. If you click your right mouse button, you will notice that a menu pops up. This menu is nothing more than an example to illustrate the style of an Openbox menu. Since it is just an example, none of the items on the menu will work unless you have actually installed those programs.

Everything in the Openbox configuration is written in the menu.xml, rc.xml and autostart.sh file, located in the system-wide location of /etc/xdg/openbox/menu.xml

Copy those files into your home directory to make it local.


$ mkdir -p .config/openbox
$ cp /etc/xdg/openbox/menu.xml ~/.config/openbox/menu.xml
$ cp /etc/xdg/openbox/rc.xml ~/.config/openbox/rc.xml

Now let's install the debian-menu:

$ sudo apt-get install menu
Restart the openbox.
And we have the debian pipe menu. ç›®


back : network-manager and repositories.
next : tint2 panel.

Tuesday, September 24, 2013

Network Manager and Repositories

The Debian Series - Part III

The first run of openbox will bring a pretty blank desktop. Right click anywhere on the desktop will show the standard openbox menu. Selecting the terminal emulator will bring an xterm - terminal emulator.

xterm is the standard terminal emulator for the X Window System. A user can have many different invocations of xterm running at once on the same display, each of which provides independent input/output for the process running in it (normally the process is a Unix shell).

We will install network-manager to manage the system connection.

NetworkManager attempts to keep an active network connection available at all times.The point of NetworkManager is to make networking configuration and setup as painless and automatic as possible. If using DHCP, NetworkManager is intended to replace default routes, obtain IP addresses from a DHCP server and change nameservers whenever it sees fit. In effect, the goal of NetworkManager is to make networking Just Work.


Open the terminal and type :


$ sudo apt-get install network-manager


For the DVD installation route,  wired connection via  network-manager is now available. 

For the USB/Net-install, you must edit /etc/network/interfaces to let network-manager manage the eth0.


$ sudo nano /etc/network/interfaces

put # in front of any eth0 configuration.


Now we will set the source list to point at debian mirror instead of the DVD.
$ sudo nano /etc/apt/sources.list

Put # in front of the DVD mirror and in front of almost everything there
and add a debian mirror :

deb http://ftp.your-country-here.debian.org/debian testing main contrib non-free
deb http://security.debian.org testing/updates main contrib non-free

The mirror list is available at debian site here.


Set the distribution string in the sources.list to the code name "testing",  make you live the life of eternal upgrades.  

Update the repositories, update and upgrade the system

$ sudo apt-get update
$ sudo apt-get upgrade
$ sudo apt-get dist-upgrade

And done. Your system is up-to-date.


Debian - Preparing The Desktop

The Debian Series - Part II


After the first reboot of the system, we will be presented by a Command Line Interfaces (CLI). Insert the DVD installation media and do :

$ sudo apt-get install xorg

This will install X Window into the system. 

Xorg is the default X Window server since Debian 4.0 (etch). It replaces XFree86 and is maintained in Debian by the XStrikeForce. 

The X.Org project provides an open source implementation of the X Window System. The development work is being done in conjunction with the freedesktop.org community. The X.Org Foundation is the educational non-profit corporation whose Board serves this effort, and whose Members lead this work. (www.x.org/wiki/)

Next, install Openbox :

$ sudo apt-get install openbox

From Openbox.org
Openbox is a highly configurable, next generation window manager with extensive standards support.
The *box visual style is well known for its minimalistic appearance. Openbox uses the *box visual style, while providing a greater number of options for theme developers than previous *box implementations. The theme documentation describes the full range of options found in Openbox themes.
Openbox lets you bring the latest applications outside of a full desktop environment. Most modern applications have been written with GNOME and KDE in mind. With support for the latest freedesktop.org standards, as well as careful adherence to previous standards, Openbox provides an environment where applications work the way they were designed to.
Openbox is a highly configurable window manager. It allows you to change almost every aspect of how you interact with your desktop and invent completely new ways to use and control it. It can be like a video game for controlling windows. But Openbox can also be kept extremely simple, as it is in the default setup, meaning that it can suit just about anybody. Openbox gives you control without making you do everything.


Openbox makes desktop environments better. By running Openbox inside the GNOME or K desktop environments, you can combine their ease and functionality with the power of Openbox. Your desktop becomes cleaner and faster, and is in your control, when you use Openbox.

type startx at the command-line,

$ startx

and now we have an openbox desktop.

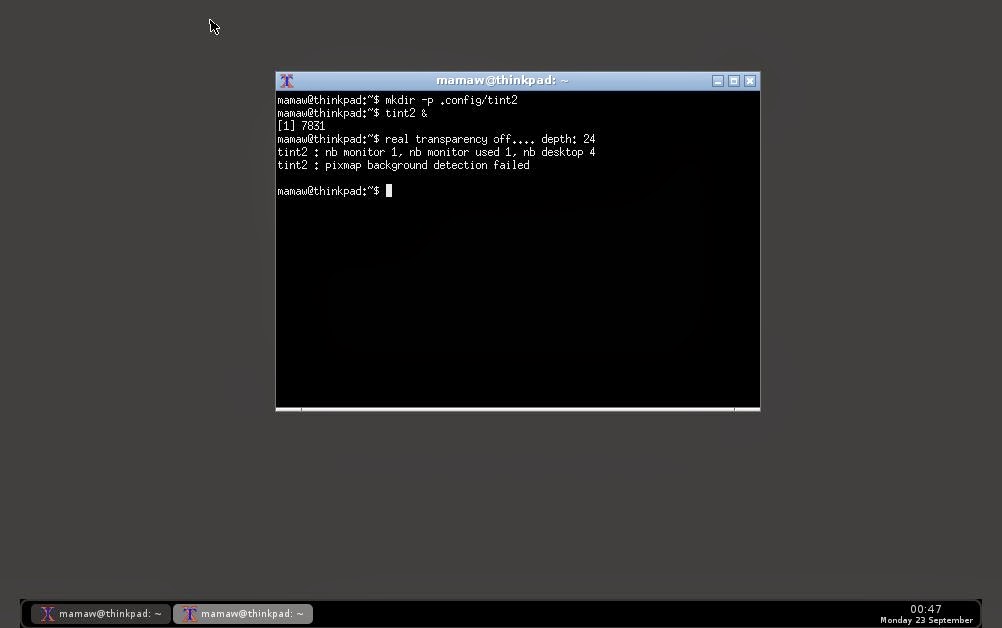
  it's pretty blank, eh?


back : Debian Minimal Install
next : network-manager and repositories.

Monday, September 23, 2013

Debian Minimal Install


The Debian Series - Part I

There are many Debian Openbox how-tos out there, from barebones, minimalis to full blown desktop.

This one is a personal cheat-sheet step by step setting Debian Openbox into my laptop.

For someone new to Debian, here are some descriptions taken from Distrowatch : 


The Debian Project is an association of individuals who have made common cause to create a free operating system. This operating system is called Debian GNU/Linux, or simply Debian for short. Debian systems currently use the Linux kernel. Linux is a completely free piece of software started by Linus Torvalds and supported by thousands of programmers worldwide. Of course, the thing that people want is application software: programs to help them get what they want to do done, from editing documents to running a business to playing games to writing more software. Debian comes with over 20,000 packages (precompiled software that is bundled up in a nice format for easy installation on your machine) - all of it free. It's a bit like a tower. At the base is the kernel. On top of that are all the basic tools. Next is all the software that you run on the computer. At the top of the tower is Debian -- carefully organizing and fitting everything so it all works together. 

The installation media can be downloaded from Debian homepage here.

Setting up the hard drive partition reference is here.

Then burn the .iso into CD/DVD.
To set up the USB installation media, simply follow the instruction given from Debian Installation Manual.

Open the terminal as super user, plug the usb and type :
# cp debian.iso /dev/sdX
# sync

For the usb route, the installation needs wired internet connection.

The Installation

Boot into USB/DVD and select Install/Graphical Install.

Proceed with select language, select location and configure locales.
Hit enter to continue.
The installation will proceed with configuring keyboard, detecting hardware and scanning the cd-rom to load additional hardware.

As for my USB installation, the installer fails to detect the cd-rom, an error message appears: "Failed to copy file From CD-ROM. Retry?". Simply plugging out the USB and plugging it into another USB Port does the trick for me.

 Enter preferred host name.
Configure The Domain. in my case i leave it empty.

Enter the root account for administering the system. Since i don't have multiple users, i leave it empty to disable root account and use sudo instead.
 Setup the user name and user login.
 Setup the password.
Configure the time zone.

For single operating system, choose guided will make life simpler.
For dual booting, choose the manual method and refer here about the partitioning scheme. pretty much the same, more or less.
 Yes, write the changes to disk.
 I installed from usb so no other DVD/CD.
It's your choice to participate in the package usage survey or not.
The installer is installing software.
 Installing Grub boot loader.
 Choose the device
Finish the installation and reboot the machine.
And welcome to the Command Line Interface of Debian.


Time to take a crash course of the command line.  

Next : Installing Openbox